Including Image/Photo in BI Publisher report
There are 3 ways to include images in BIP report as stated in Peoplebooks.
- Inserting images.
- Importing images.
- Rendering image field data (BLOB).
Actually it depends on nature of how dynamic is your photo in the report.
For static images, which are not going to change with different reports, the images can be directly inserted into the report by usual word “Insert Image” feature.
For reports which have a small list of images, and one of them is included in the report depending on certain condition.
For cases like this we need to import image from sub-template file.
To import an image from a sub-template file:
- Embed the .jpg, .gif, or .png into the sub-template file.
For example,
Oracle_Logo
where Oracle_Logo is the actual .jpg, .gif, or .png.
- Import the sub-template file that includes the image by including the following syntax at the top of the
primary template file:
In this code sample, sub-template_NAME is the registered sub-template ID in the Content
Library.
- Add the calling details in the primary template at the appropriate location using the following syntax:
In this code sample, logo2x.5 is the name of the component that contains the image in the subtemplate
file.
Different subtemplate can be called depending on required condition and corresponding image is printed. This is only useful when we have small list of images otherwise we end up creating too many subtemplate and too many conditions to be added in the report.
The third way, and most common scenario is totally dynamic image such as employee’s images when the report is run for specific employee and report pulls up the image of employee from the database and shows it up in the report.
BI Publisher supports the rendering of BLOB (Base64 encoded) data fields in an XML file.
If you are running application on Peopletools 8.54 and Application on 9.2, this is quite an easy task.
Basically it involves only two step:
- Changing your PS query properties to include image field.
Open the query which has the image field.
Click on the properties hyperlink.

Select the check box: Image Data in the box for image fields.
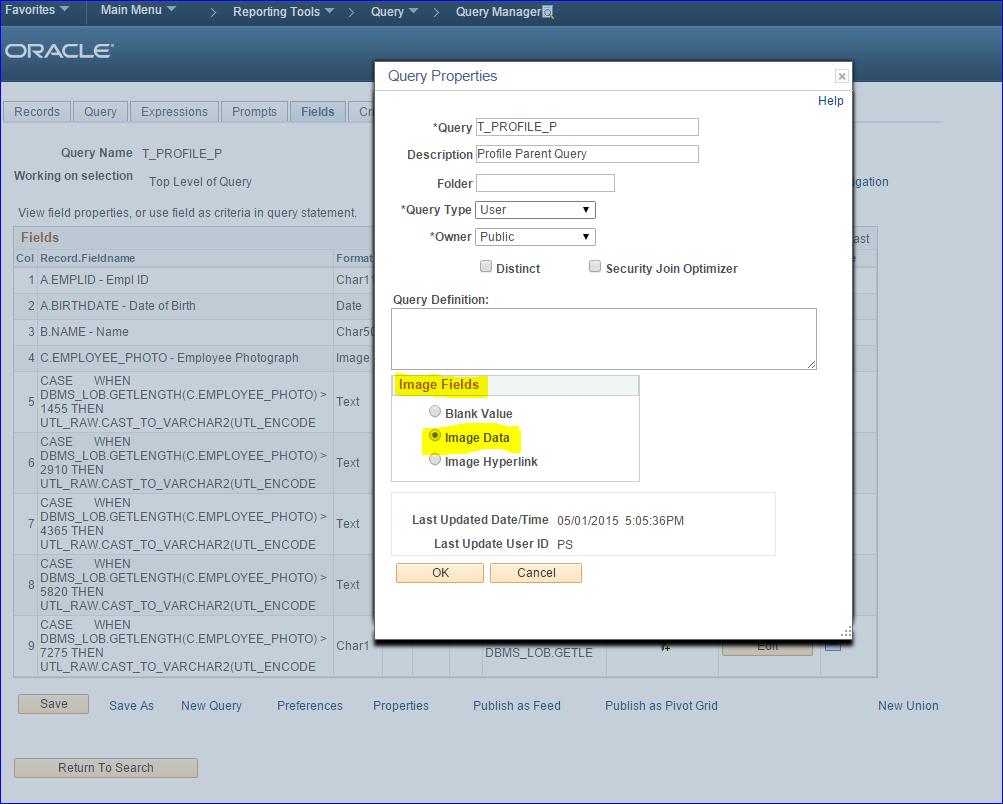
This features for Image fields in available from 8.54 and not even in 8.53.
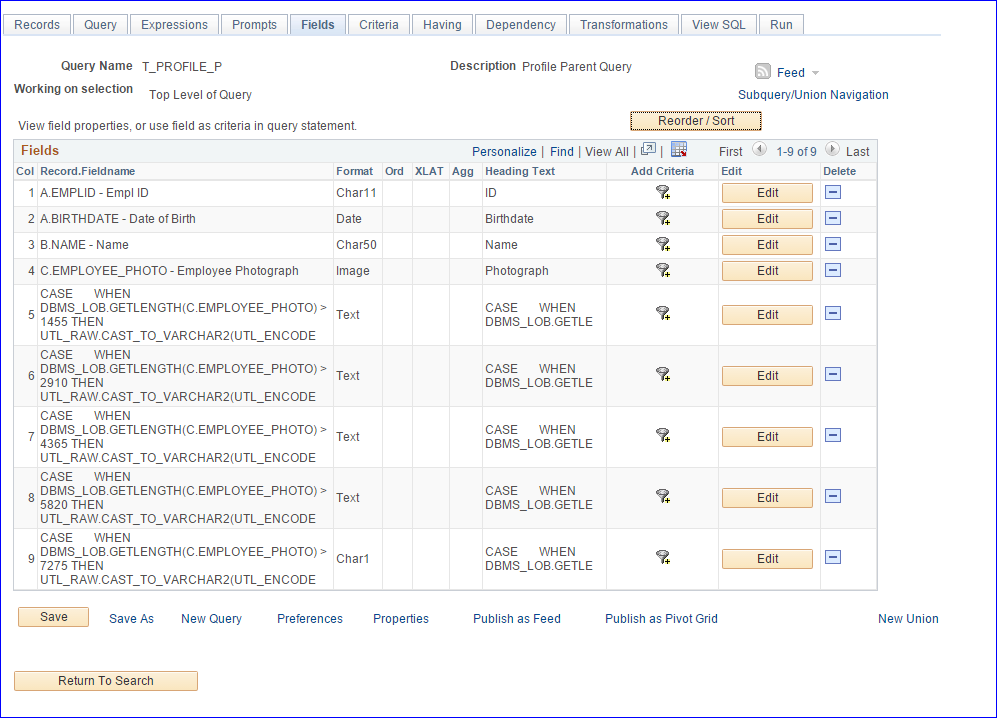
- The second step is add the image field in your template.
Double click on it and you will get the code window.
Type the below code.

Replace the value(C.EMPLOYEE_PHOTO) within quotes according to your fieldname
If the photo type is gif,BMP or any other format change the content type accordingly.
e.g. “image/gif”
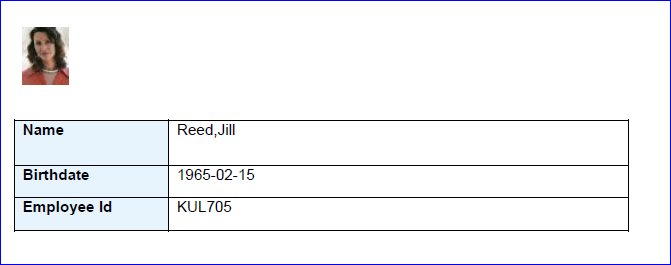
Now upload the RTF template, we are good to go.
Run the report and image is pulled up in the report.

The image size might not be ideal at the first time, but you may add other parameter to adjust its size.
Image size attributes in inches:
Image size attributes in pixels:
<fo:instream-foreign-object content-type=”image/jpg” height=”300 px” width=”400 px”>
Image size attributes in centimeters:
Image size attributes as a percentage of the original dimensions:
If you running on tools version lesser than 8.53 or lower, you may try the next method.
It also involves two step:
- Modifying your PS query to convert to BLOB image into base64.
Oracle comes with the utility for encoding the BLOB data into base64 but has a size limitation and many of the photos in database will cross this limit.
In order to achieve complete encoding of the image field, we can split the content into different parts and encode each part separately.
You can make use of the “CASE” statement as shown below.
You may need to write all the case statement as expression and use these expressions as field.
The PSQUERY SQL should look something like below.
SELECT
CASE
WHEN DBMS_LOB.GETLENGTH(EMPLOYEE_PHOTO) > 1455 THEN UTL_RAW.CAST_TO_VARCHAR2(UTL_ENCODE.BASE64_ENCODE(DBMS_LOB.SUBSTR(EMPLOYEE_PHOTO, 1455, 1)))
WHEN DBMS_LOB.GETLENGTH(EMPLOYEE_PHOTO) <= 1455 THEN UTL_RAW.CAST_TO_VARCHAR2(UTL_ENCODE.BASE64_ENCODE(EMPLOYEE_PHOTO))
END AS C1,
CASE
WHEN DBMS_LOB.GETLENGTH(EMPLOYEE_PHOTO) > 2910 THEN UTL_RAW.CAST_TO_VARCHAR2(UTL_ENCODE.BASE64_ENCODE(DBMS_LOB.SUBSTR(EMPLOYEE_PHOTO, 1455, 1456)))
WHEN DBMS_LOB.GETLENGTH(EMPLOYEE_PHOTO) <= 2910 AND DBMS_LOB.GETLENGTH(EMPLOYEE_PHOTO) > 1455 THEN UTL_RAW.CAST_TO_VARCHAR2(UTL_ENCODE.BASE64_ENCODE(DBMS_LOB.SUBSTR(EMPLOYEE_PHOTO, DBMS_LOB.GETLENGTH(EMPLOYEE_PHOTO) – 1455, 1456)))
END AS C2,
CASE
WHEN DBMS_LOB.GETLENGTH(EMPLOYEE_PHOTO) > 4365 THEN UTL_RAW.CAST_TO_VARCHAR2(UTL_ENCODE.BASE64_ENCODE(DBMS_LOB.SUBSTR(EMPLOYEE_PHOTO, 1455, 2911)))
WHEN DBMS_LOB.GETLENGTH(EMPLOYEE_PHOTO) <= 4365 AND DBMS_LOB.GETLENGTH(EMPLOYEE_PHOTO) > 2910 THEN UTL_RAW.CAST_TO_VARCHAR2(UTL_ENCODE.BASE64_ENCODE(DBMS_LOB.SUBSTR(EMPLOYEE_PHOTO, DBMS_LOB.GETLENGTH(EMPLOYEE_PHOTO) – 2910, 2911)))
END AS C3,
CASE
WHEN DBMS_LOB.GETLENGTH(EMPLOYEE_PHOTO) > 5820 THEN UTL_RAW.CAST_TO_VARCHAR2(UTL_ENCODE.BASE64_ENCODE(DBMS_LOB.SUBSTR(EMPLOYEE_PHOTO, 1455, 4366)))
WHEN DBMS_LOB.GETLENGTH(EMPLOYEE_PHOTO) <= 5820 AND DBMS_LOB.GETLENGTH(EMPLOYEE_PHOTO) > 4365 THEN UTL_RAW.CAST_TO_VARCHAR2(UTL_ENCODE.BASE64_ENCODE(DBMS_LOB.SUBSTR(EMPLOYEE_PHOTO, DBMS_LOB.GETLENGTH(EMPLOYEE_PHOTO) – 4365, 4366)))
END AS C4,
CASE
WHEN DBMS_LOB.GETLENGTH(EMPLOYEE_PHOTO) > 7275 THEN UTL_RAW.CAST_TO_VARCHAR2(UTL_ENCODE.BASE64_ENCODE(DBMS_LOB.SUBSTR(EMPLOYEE_PHOTO, 1455, 5821)))
WHEN DBMS_LOB.GETLENGTH(EMPLOYEE_PHOTO) <= 7275 AND DBMS_LOB.GETLENGTH(EMPLOYEE_PHOTO) > 5820 THEN UTL_RAW.CAST_TO_VARCHAR2(UTL_ENCODE.BASE64_ENCODE(DBMS_LOB.SUBSTR(EMPLOYEE_PHOTO, DBMS_LOB.GETLENGTH(EMPLOYEE_PHOTO) – 5820, 5821)))
END AS C5
FROM PS_EMPL_PHOTO
WHERE EMPLID = ‘KUL705′;

So you will have 5 extra fields in your PSQUERY as base64 encoding and you may concatenate all of them to get the final data.
The concatenation can be done either on PSQUERY level or at the report level.
Concatenation also has limitation of size and it may fail for very large photo.
I will be doing concatenation at the report level.
- Modify the RTF template:
Add a dummy field on the report.
Double click on the field to open the code.

concat(EXPR5_5,EXPR5_6,EXPR5_7,EXPR5_8,EXPR5_9)“/>
You just need to concatenate all the columns containing the image data in base64 encode.
Use concat() function as shown above.
Now we can run the report.
And the report is successfully printing the image.
The size of the report can be adjusted as explained earlier.
The second method is not tested with tools 8.53 and lower version, so if the second method also doesn’t work for you, you may refer oracle support, there is a document on how to import image in lower tools version.
RadicalX is here.
ReplyDeleteHi, Thanks a lot for the post.
ReplyDeleteThough I am looking something where we generate the xml from application engine and then use the xml for the BI Publisher report.
How do I display images using PDF template? not RTF. Is it possible?
ReplyDelete